#100daysofGatsby - Sprint 1

Writing code, breaking things, then pretending it was a feature. 🤡 | Senior Software Engineer | Dreaming of Big Tech, a GDE badge, and a Koenigsegg. 🚀
In this blog series, I will be documenting my 100daysofGatsby journey. I will try to keep it as interesting as possible.
Without further ado, Let's dive in.

Below are the things which we need to make for the first sprint
- Build a proof of concept (POC) Gatsby site to test their routing API, builds service, hosting, and Contentful integration
- Use Gatsby’s Contentful plugin and connect to a test Contentful site
- Create the following pages:
- home
- about
- and a collection of pages for every city we’re in.
- Build it on Gatsby Cloud and use their preview URL
- No styling needed for the first sprint
You can find the detailed briefing in this link
Let's get to work

Heads-up: Make sure you have Node.js,npm, and Git CLI installed.
Check out the official npm docs for downloading and installing Node.js and npm in your machine.
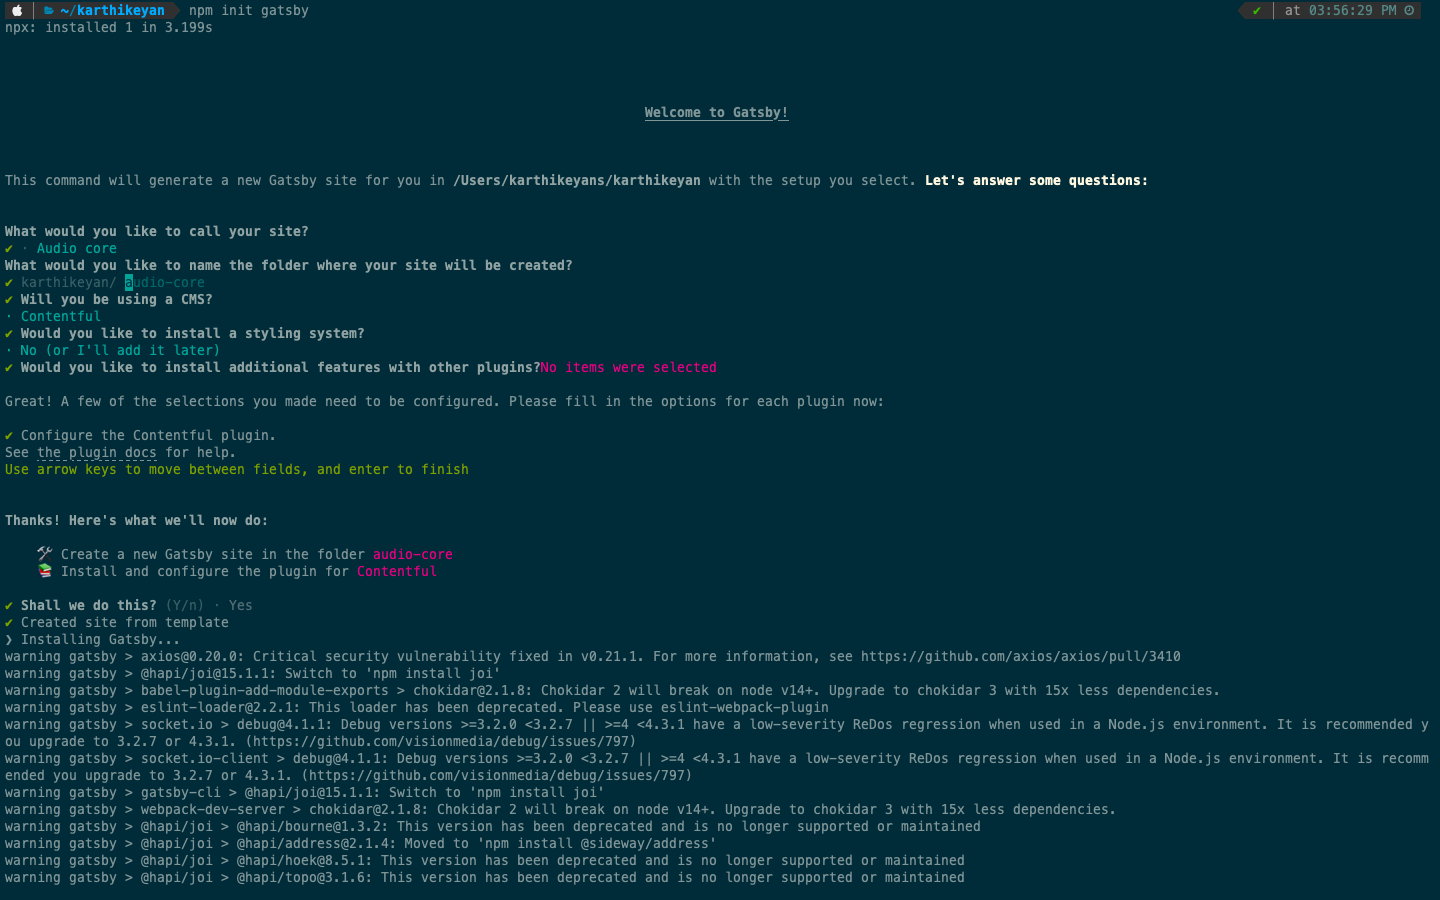
Installing Gatsby:
npm init gatsby
You should see something like this

- Give the site name as
audio-coreas it is more contextual. Feel free to give any name you like. - choose the folder in which the site will be created.
- Since we are asked to connect to
ContentfulCMS, let's go with option 2 in the list. - Let's ignore the styles for now and press enter
- Let's do the same for the plugins and press
doneand move to the next step - Now for the configuration of the contentful plugin, press enter and do not add the API keys and space id. We will do it later when creating a new space in the contentful app.
With the installation in progress, let's create our API key and space id in the contentful to connect with our gatsby site.

Setting up Contentful:
Create your contentful account by visiting this link.
Create the space for your project.
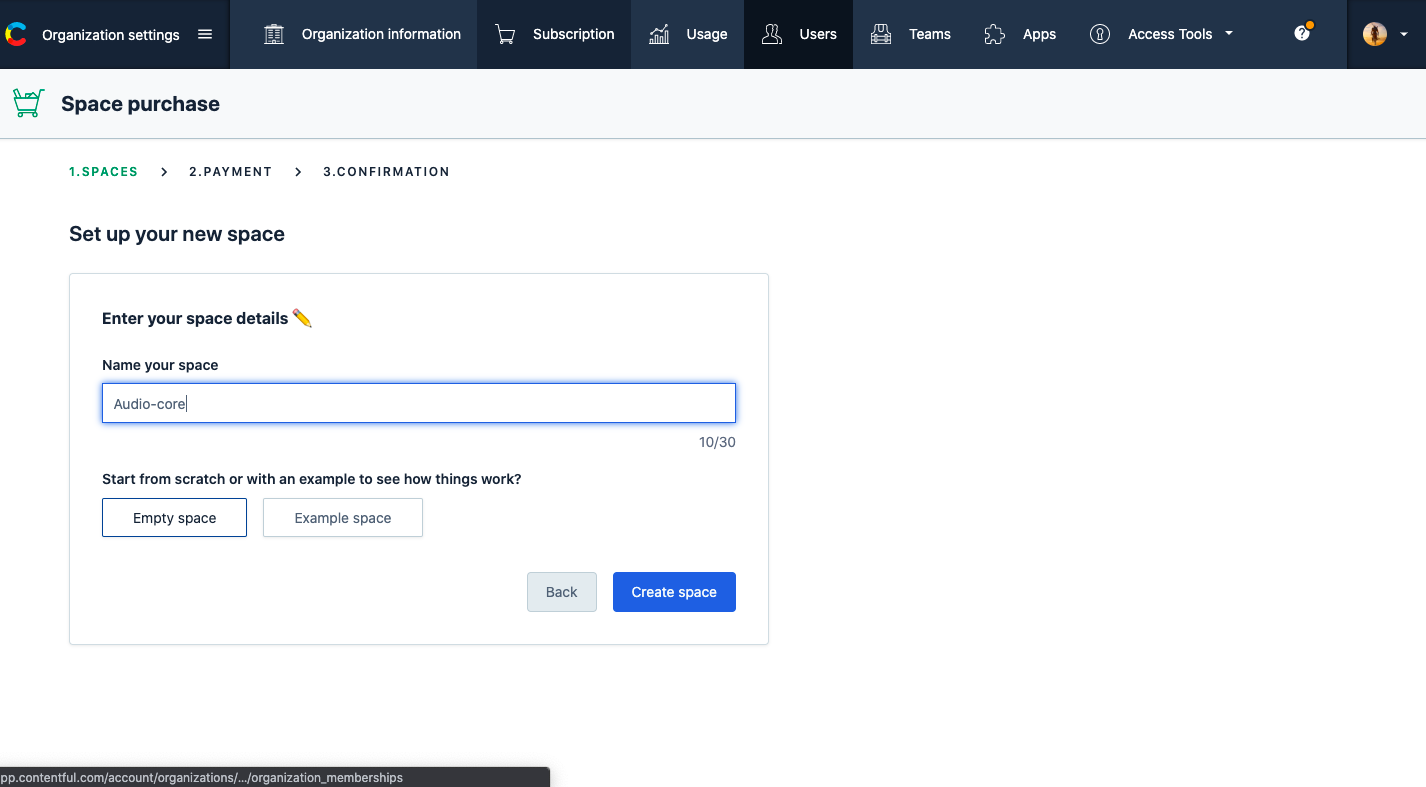
- Clicking on
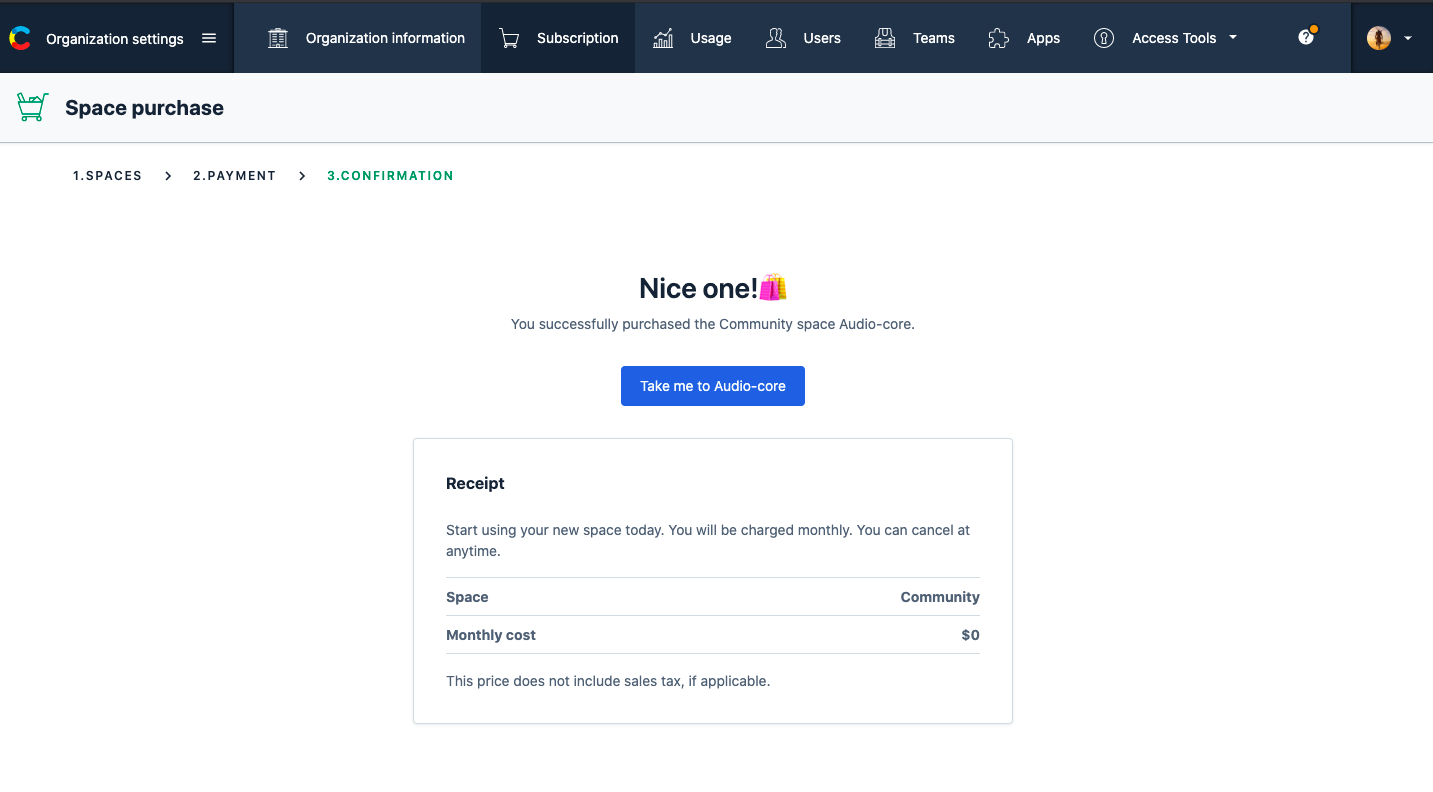
create Spaceshould take you to the final screen as Contentful allows you to create 2 project spaces with the free plan. You can take a look at their pricing structure by visiting their official website.
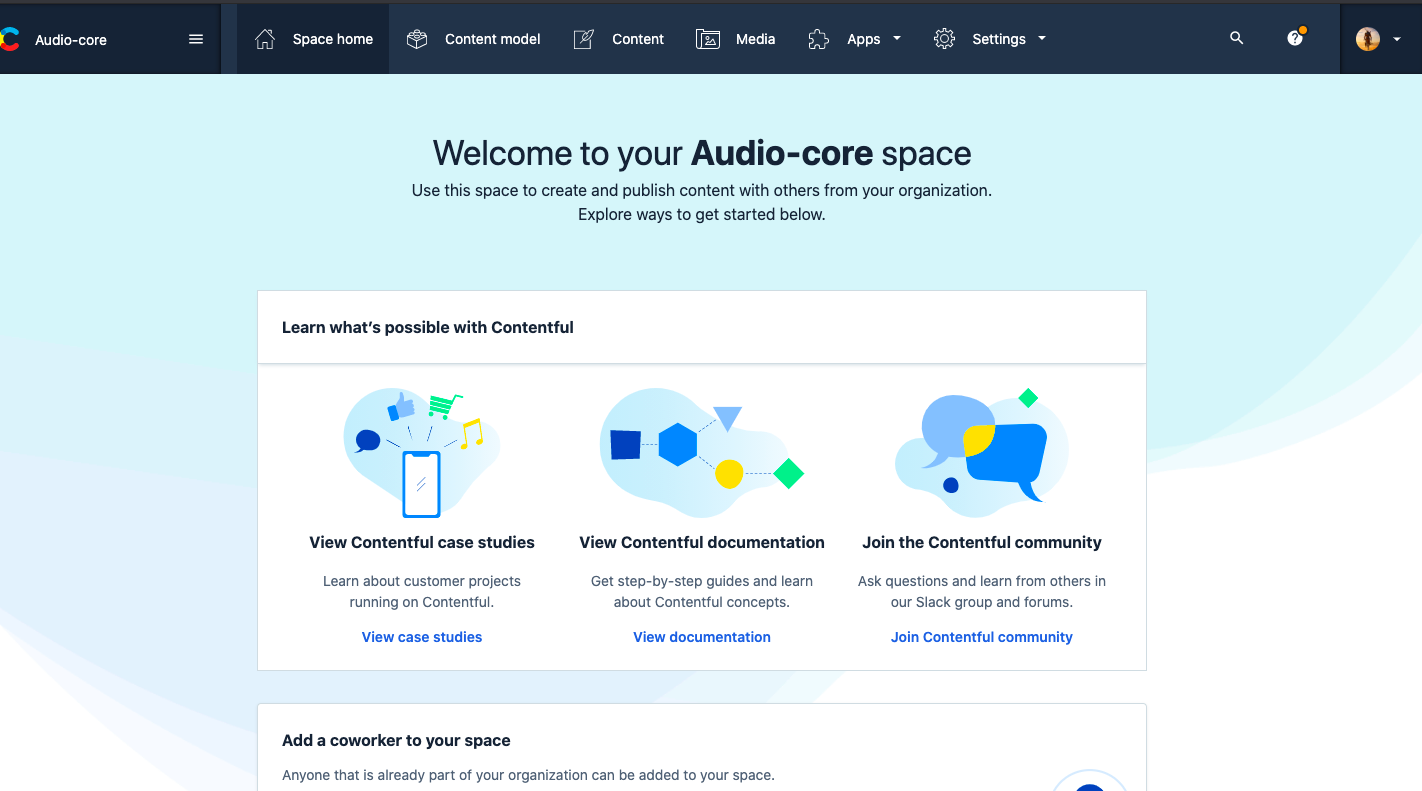
Finally, the welcome screen for your space.
Adding Content Model and Types:
Now click on the Content model to create your first content type. A content model structures and organizes your content. It’s made up of content types.
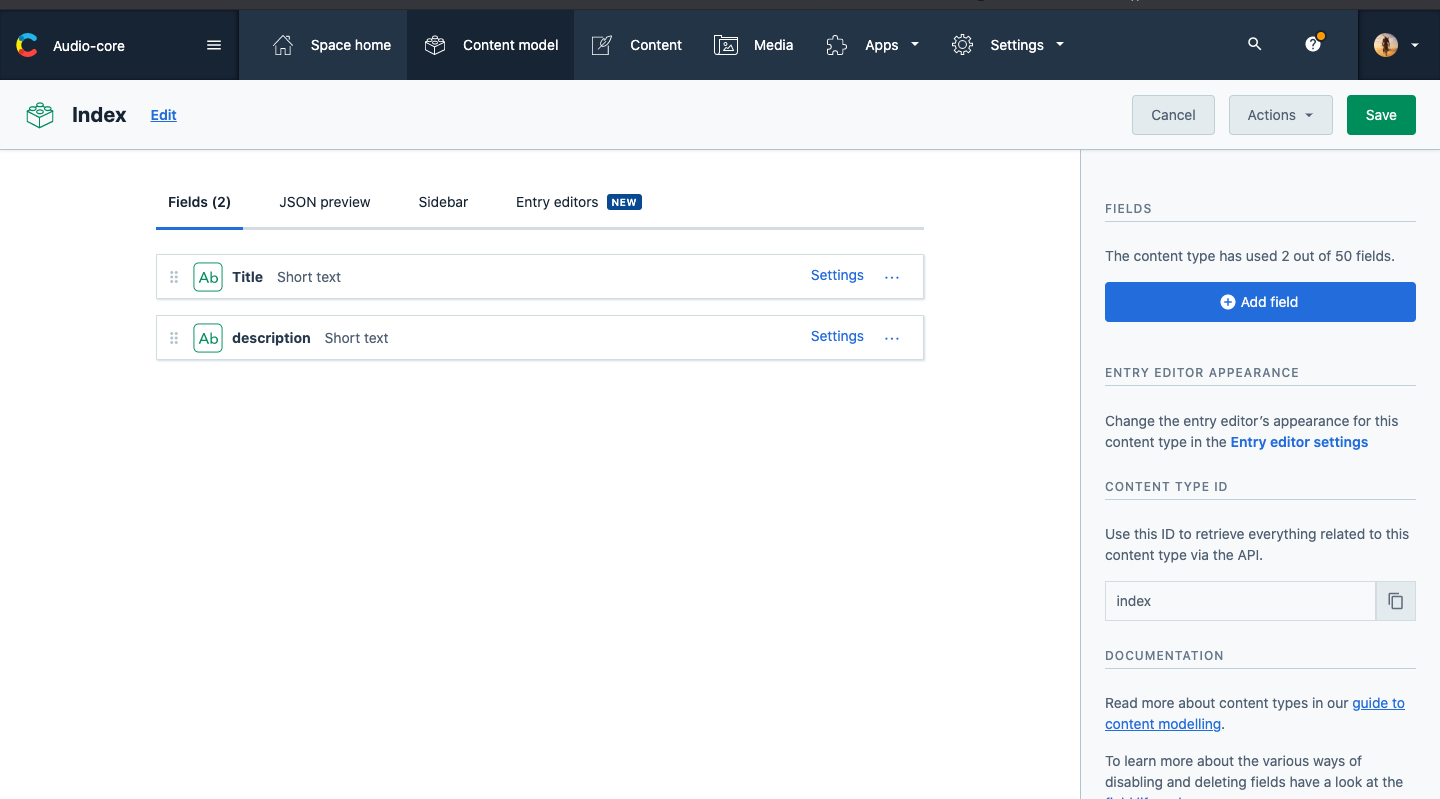
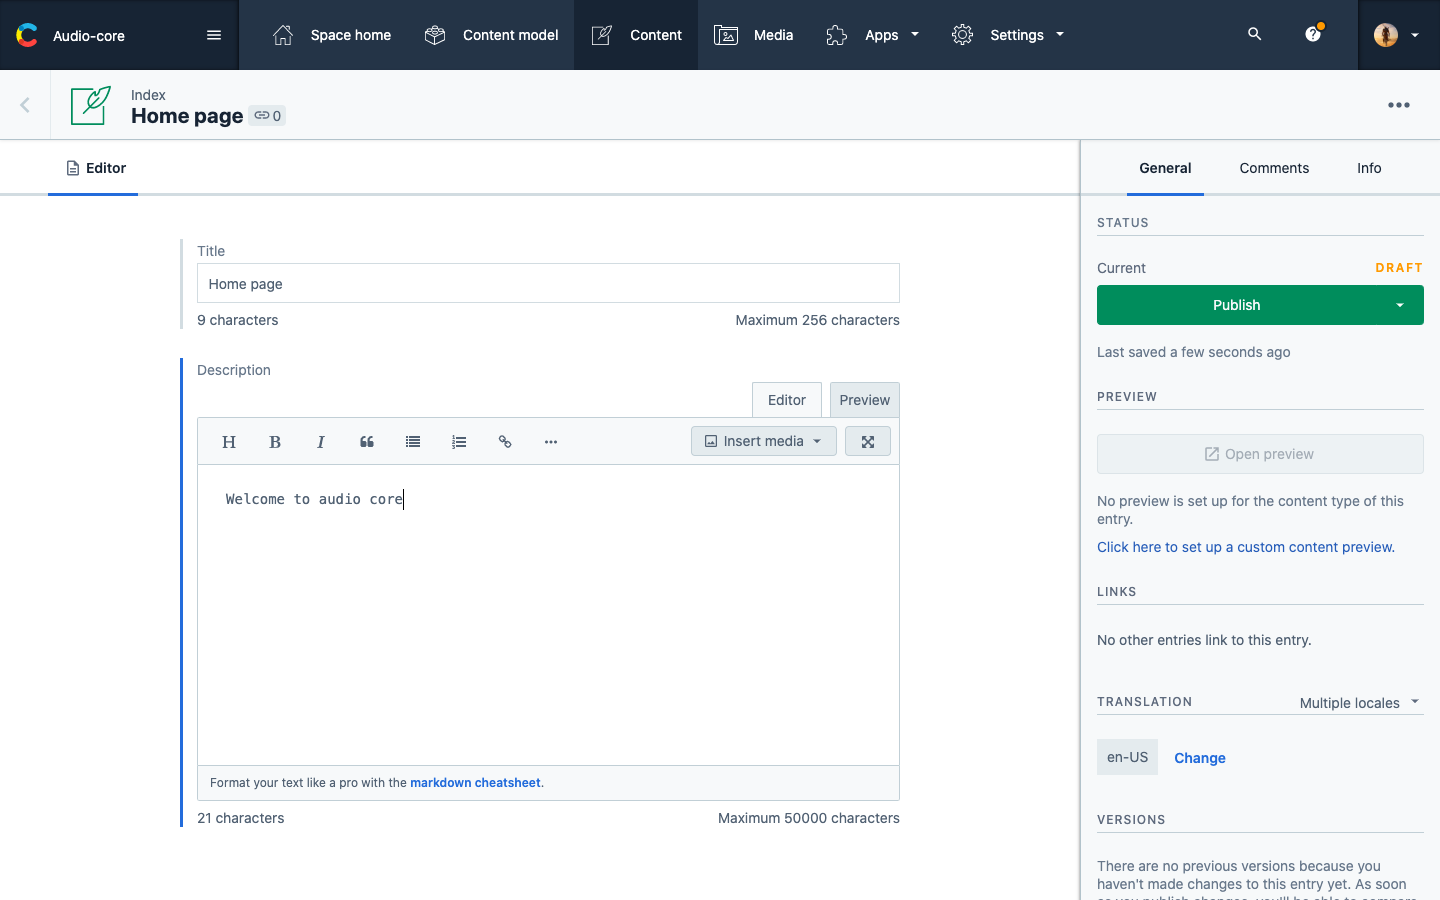
Name the first content type as index, which will help us in serving the data related to homepage.
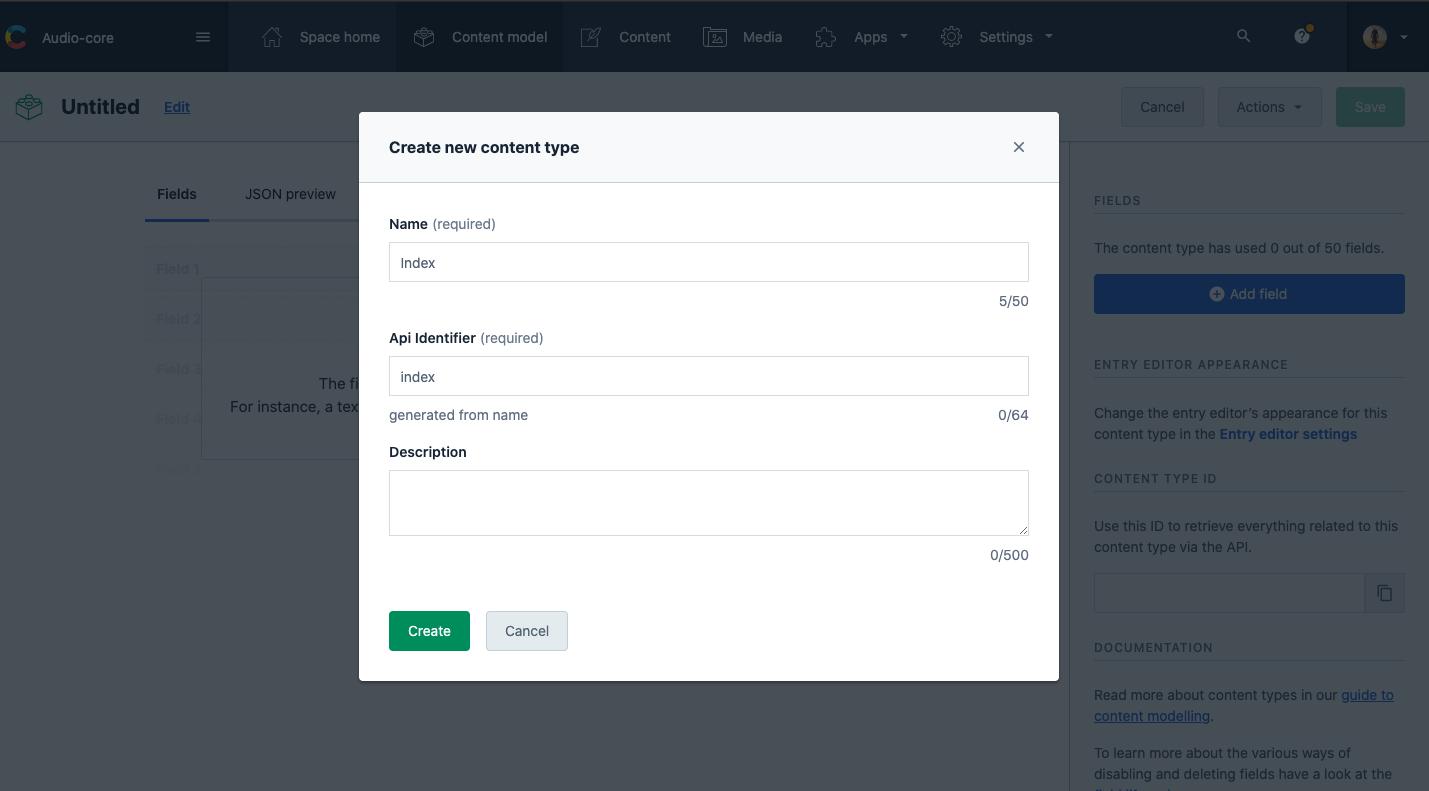
Now for the home page, let's create two fields Title and Description, and hit save.
For the about us page, let's add another content type About which will also hold the same as Index two fields Title and Description.
The reason why I am creating title and description in the CMS is that it will remain static and I do not need to change it every time via code, updating the CMS will automatically publish the updated contents to the app. We will see how it will happen in part 2 of the series.
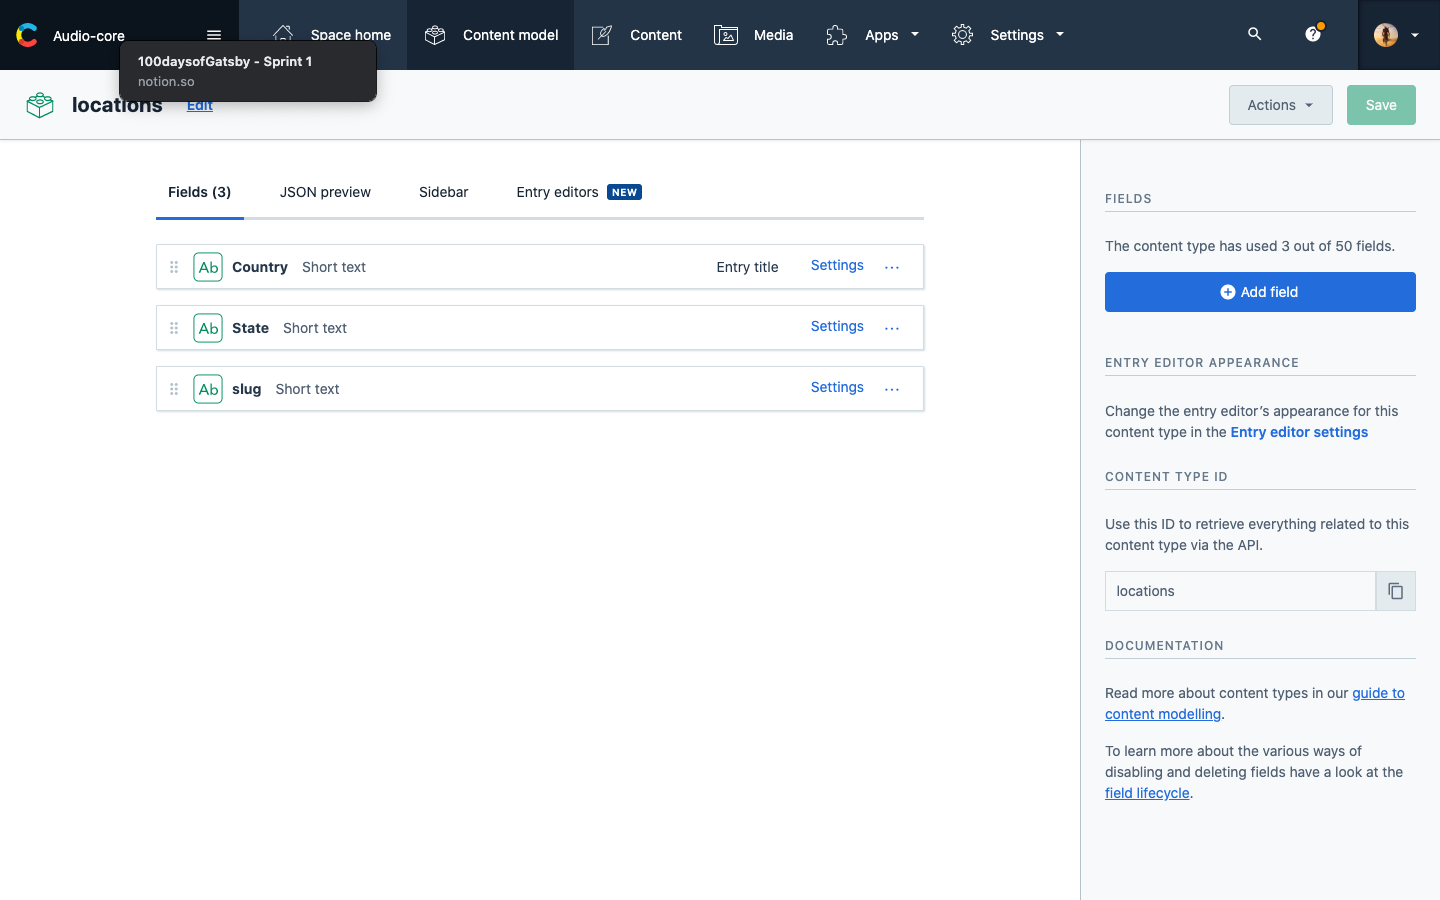
Let's add the following three fields for the locations page.
- slug
- state
- country
Slug for routing purposes. It will be automatically created when we enter the name of the country. State and country for displaying in the separate locations page.
After creating, it should look something like this.
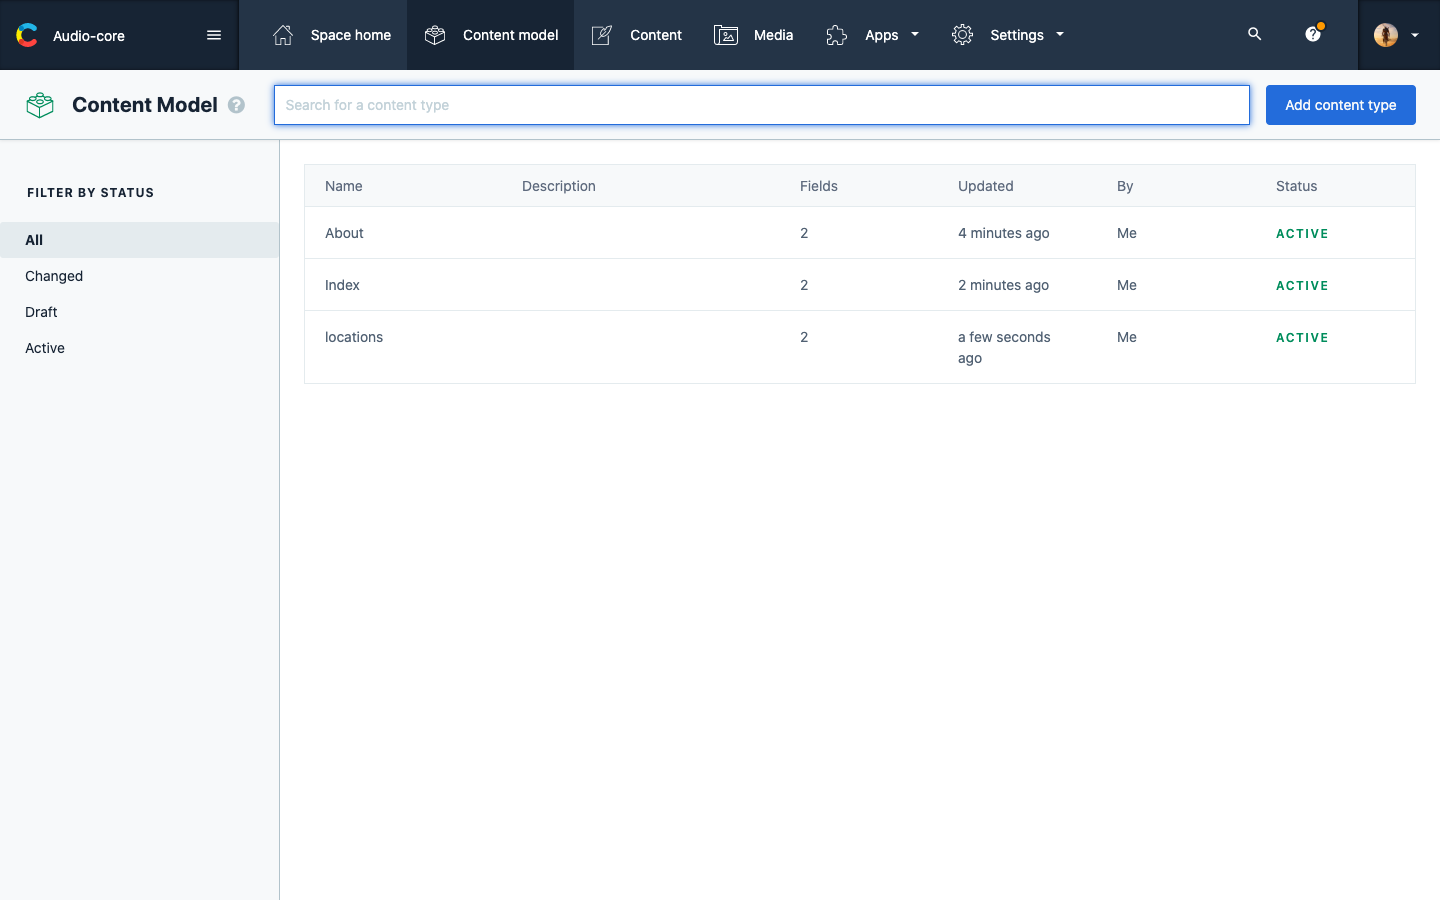
Your content-model dashboard should look something like this.
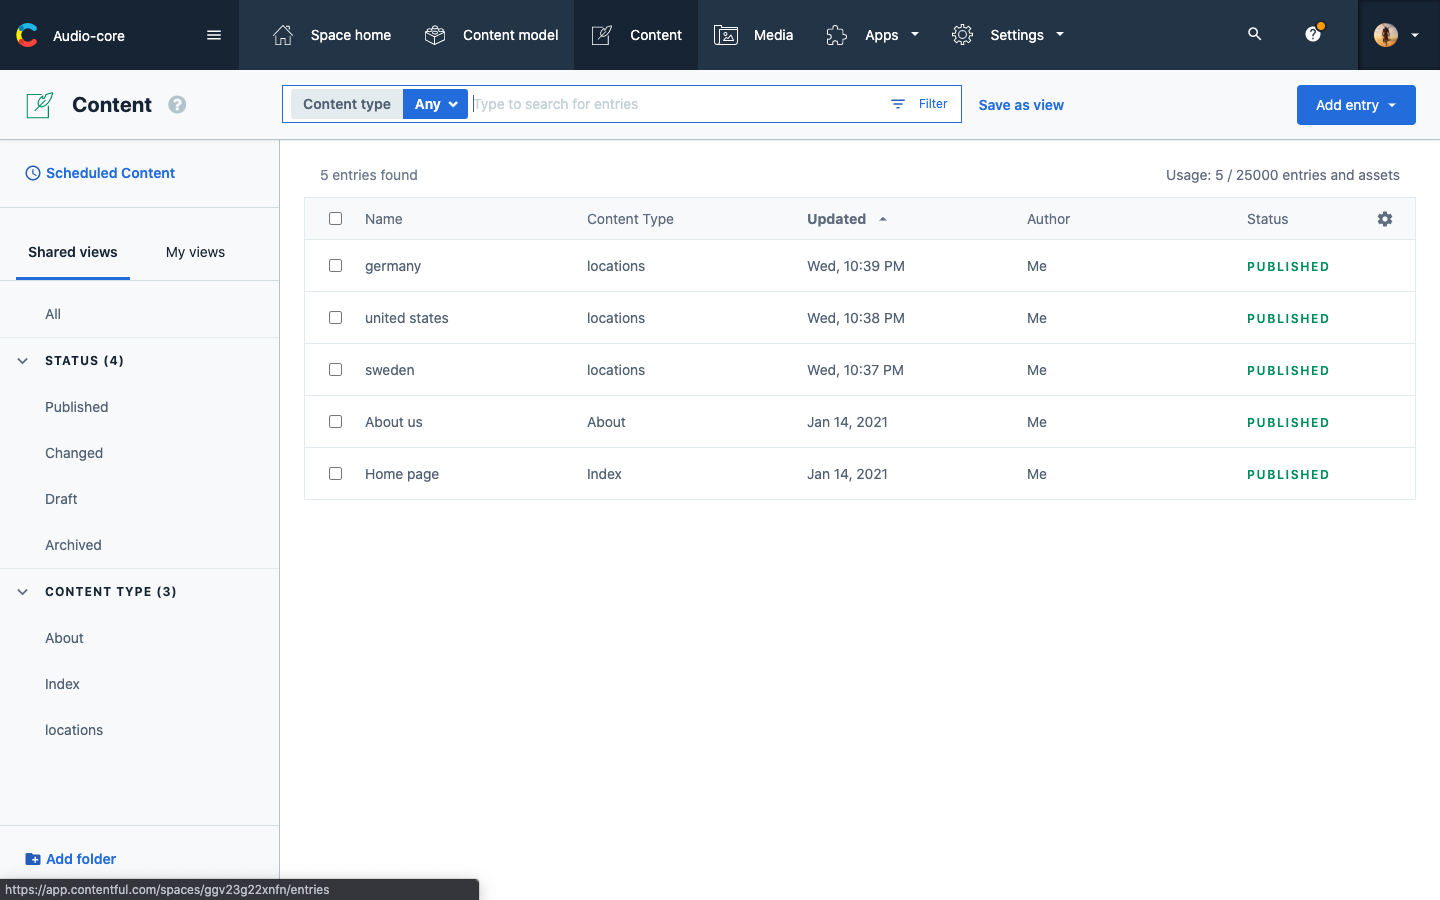
Let's add some dummy content, before connecting this with gatsby.
- Go to content and select
add entryand then select the content type as Index and clickAdd New index.
- Click
publishand go back to the dashboard.
Let's repeat the same process for the about us and locations and add the static data which we will be used to render in the front end part of our app.

The installation process should be over by now. Let's connect our gatsby site with contentful.
Connecting Gatsby and Contentful:
Click on the settings and go to the API keys and click on Add API key

Since we have created our API key and the space id. Let us connect it with our site.
Open gatsby-config.js and add the space id and the API key for the access token.

🚨 Do not add the API key as plain text.
Run this below command to install dotenv to create env variables. It helps in managing our env variables.
yarn add dotenv
After that create .env file in the root of your project folder and create the variable and add the contentful access token value.
Add the env variables to your gatsby.config.js file.
const dotenv = require('dotenv')

dotenv.config()

module.exports = {
  siteMetadata: {
    title: "Audio core",
  },
  plugins: [
    {
      resolve: "gatsby-source-contentful",
      options: {
        accessToken: process.env.CONTENTFUL_ACCESS_TOKEN,
        spaceId: process.env.CONTENTFUL_SPACE_ID,
      },
    },
  ],
};
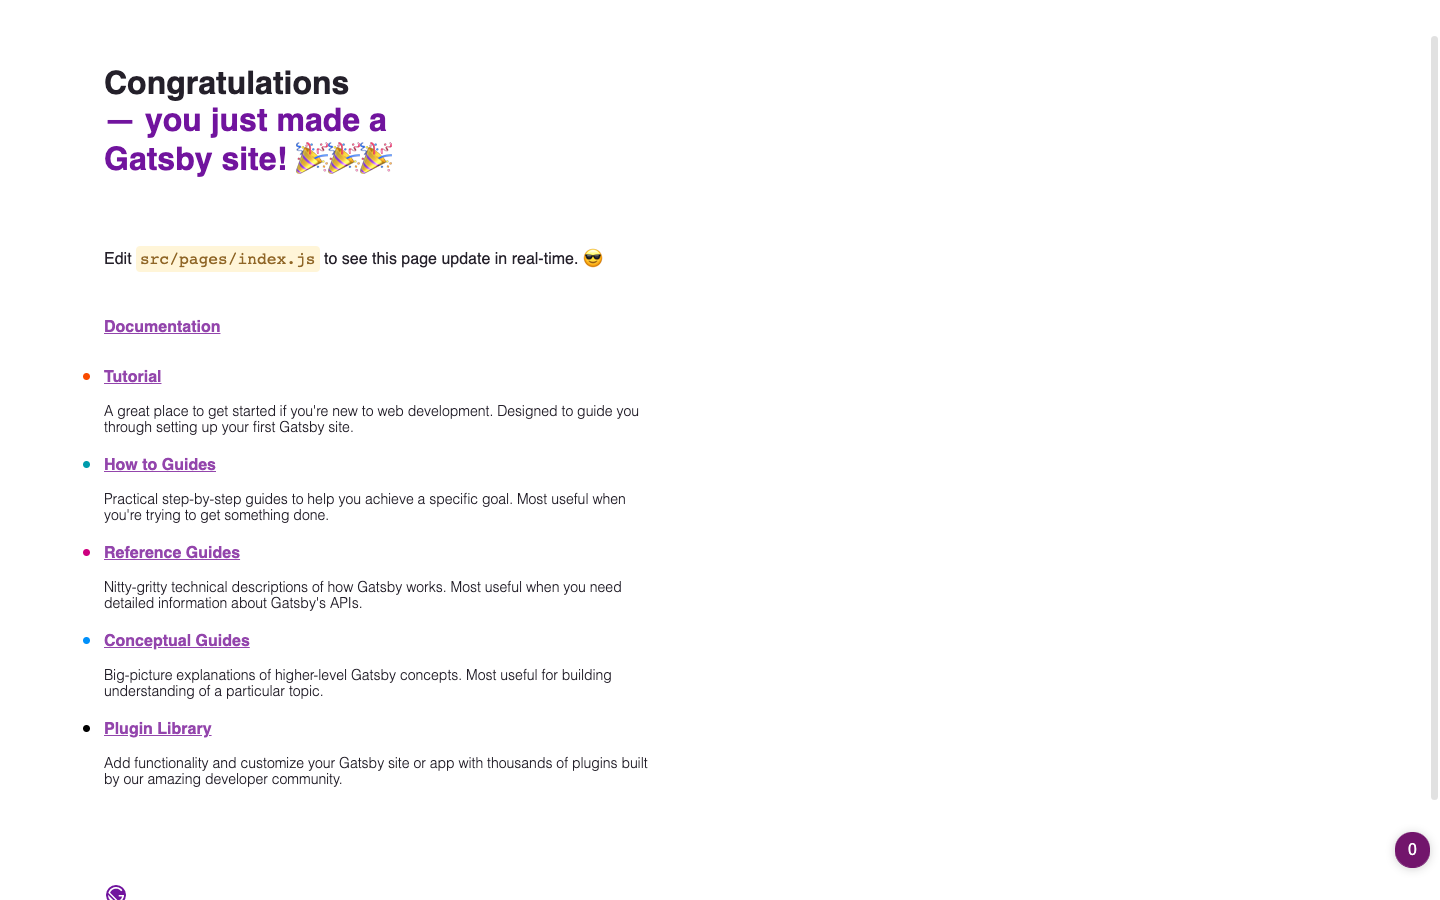
Let's fire up our starter application.
Run this command
yarn develop

Open this link localhost:8000 and you should see this in your browser.
Before wrapping up part 1, let's verify whether we are able to access the data from the contentful. You should be able to access the graphql playground via this
http://localhost:8000/___graphql
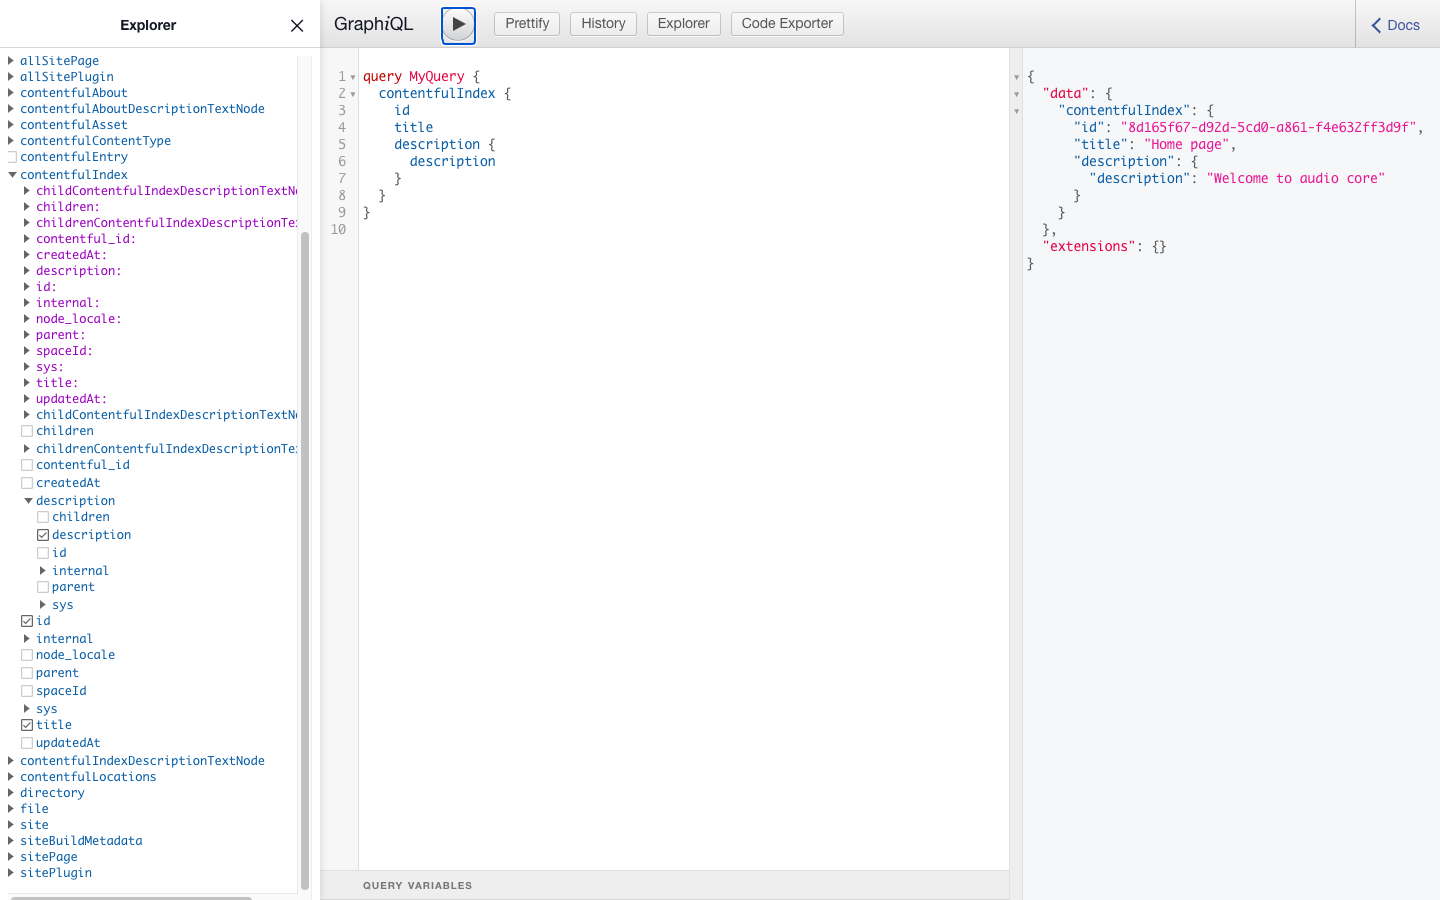
🎉🎉🎉 Awesome, we are able to query the data which we need from the CMS.
That's a wrap on part 1 of this sprint.

Thank you for reading. Feedbacks are always welcome. If I have missed something or if you have any doubts, please let me know in the comments. See you in part 2.

Resources:


