How to build a Hacker news clone using Remix, Tailwind css ?

Writing code, breaking things, then pretending it was a feature. 🤡 | Senior Software Engineer | Dreaming of Big Tech, a GDE badge, and a Koenigsegg. 🚀
Hello everyone, In this tutorial we will be seeing how to build a simple Hacker news clone using Remix and Tailwind css.
Remix is a full stack react framework which renders the data on the server and sends the html to client side as a response.
Let's code !!!

Pre-requisite: Node version should be atleast 16.3.0
Setting up Remix:
Let’s first set up our remix application. Open the terminal and enter the following
# create the remix boilerplate

npx create-remix@latest

# Answer the basic questions

**Where would you like to create your app?** remix-hn-clone
**What type of app do you want to create?** Just the basics
**Where do you want to deploy? Choose Remix if you're unsure; it's easy to change deployment targets**. Remix App Server
**Do you want me to run `npm install`?** Yes
**TypeScript or JavaScript?** TypeScript

# changing to project directory

cd remix-hn-clone

# run the application

npm run dev
The above command creates a boilerplate remix application for us to start with. Once you run npm run dev you should see the basic remix application rendered on the browser.
Now with remix set up done, let add tailwind css to our application.
Setting up Tailwind css
Open up your terminal and run the following commands
# install tailwind css

npm install -D tailwindcss

# create the configuration file for tailwindcss

npx tailwindcss init
Open up your tailwind.config.ts file and add in the following
module.exports = {
  content: [
    "./app/**/*.{ts,tsx}",
  ],
  theme: {
    extend: {},
  },
  plugins: [],
}
Now we need to add the scripts in our package.json, so that it will generate css during the dev and production build.
Update your script section in package.json with following
    "build:remix": "remix build",
    "dev:remix": "remix watch",
    "dev": "yarn build:remix && run-p dev:*",
    "generate:css": "npx tailwindcss -o ./app/tailwind.css",
    "dev:css": "npm run generate:css -- --watch",
    "build:css": "npm run generate:css -- --minify",
    "build": "run-s build:*"
generate:css script uses the tailwindcss cli to generate the css whenever we add the relevant class name to our component.
We have to create two other scripts for development and production. dev:css will generate relevant css for the development environment and since we have paired it up with --watch option , live generation of css happens in the background.
For production environment , we can create an another script prod:css that minifies the css asset.
Finally with help of the run-s cli command we create a build script that runs the command sequentially. So run-s build:* will first run remix build followed by build:css script.
Now that we have integrated the script , let's add in the reference of tailwind in our application.
Open app/root.tsx file and add in the following content
import styles from "./tailwind.css";

export const links = () => [
  { rel: "stylesheet", href: styles },
];
why to add the reference of the styles in the root.tsx file ?

Remix has a cool feature called route based styling. So when we add the styles needed for that particular page in the specific routes file remix will internally take care of loading and unloading the styles whenever the page is being loaded.
More info on the route-based styling
Since we will be having a single page application which will render the news from the api. we can add the styles either in the app/root.tsx file or app/routes/index.tsx file.
Now with integration complete, we can start using the tailwind classes in our components. Open the app/routes/index.tsx and replace with following content
export default function Index() {
  return (
    <div>
      <h1 className="font-serif text-center p-4">Welcome to Remix</h1>
    </div>
  );
}
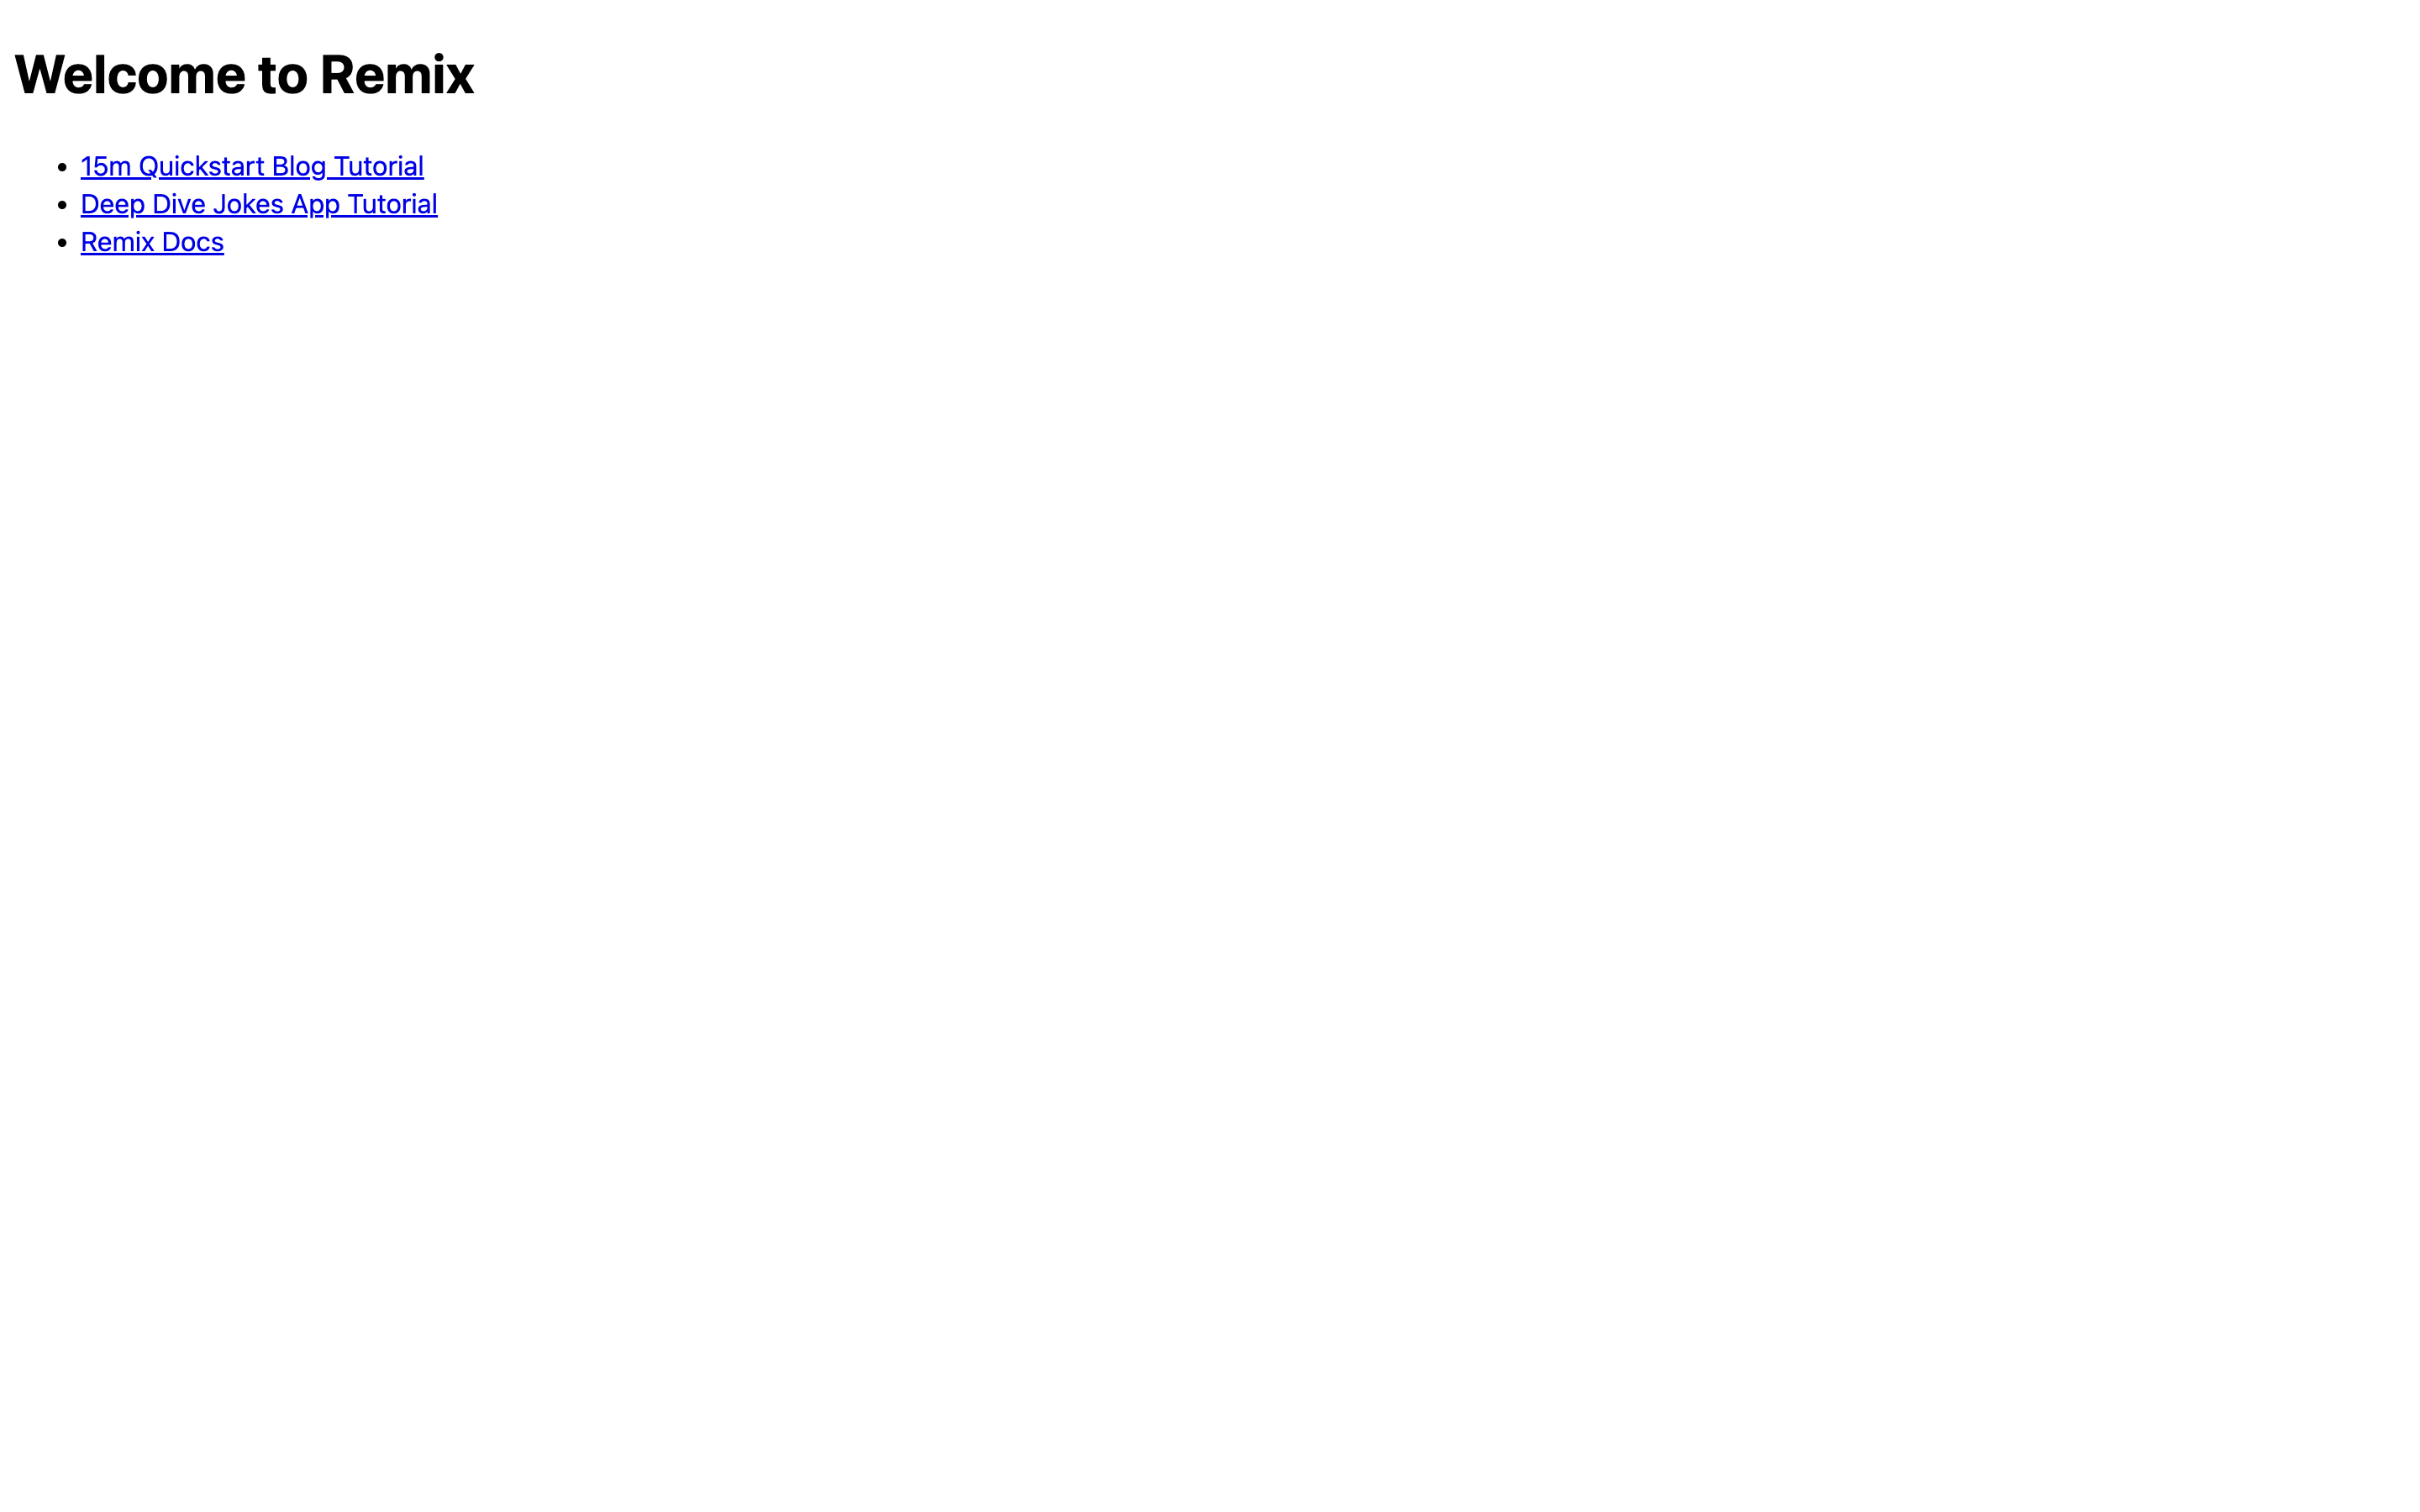
When you check the browser with your chrome dev tools open , you can see the classes being applied to h1 tag successfully.
Nice we have successfully integrated remix with tailwind css. Next step is to use the hacker news api to fetch the data and render them

Reusable components:
Create the components/layout.tsx under the app folder and add in the following content.
// layout.tsx

import { NavLink } from "@remix-run/react";

const Layout = ({ children }: any) => {
  return (
    <>
      <header className="text-gray-600 body-font">
        <div className="container mx-auto flex flex-wrap p-8 flex-col md:flex-row items-center">
          <NavLink
            to="/"
            className="flex title-font font-medium items-center text-gray-900 mb-4 md:mb-0"
          >
            <span className="text-xl">Hacker News</span>
          </NavLink>
        </div>
      </header>
      <div className="mx-auto container p-8">{children}</div>
    </>
  );
};

export default Layout;
In layout component we are using remix’s NavLink component to navigate between the pages.
Let’s go ahead and create a simple card component which we will be using later in our application. Create a file called Card.tsx under the components folder and paste the following content.
Note:
# we will be using moment lib to mess with dates

npm install moment
import moment from 'moment';

export type CardProps = {
  title: string
  point: string
  author: string
  time: number
}

const Card = (props: CardProps) => {
        return (
            <section className="text-gray-600 body-font overflow-hidden">
              <div className="py-2 mx-auto">
                <div className="-my-8">
                  <div className="py-8 flex flex-wrap md:flex-nowrap">
                    <div className="md:flex-grow">
                      <h5 className="font-medium text-gray-900 title-font mb-2">
                        {props.title}
                      </h5>
                      <p className="leading-relaxed">
                       {props.point} by {props.author} {moment.unix(props.time).fromNow()}
                      </p>
                    </div>
                  </div>
                </div>
              </div>
            </section>
          );


};

export default Card;
We will be using both card and the layout when we are coding our main page of the application.
One last step !!!
Rendering the news articles:
Let’s now fetch the data from the hacker news api and render it on the screen. Open up the routes/index.tsx file and add in the following content.
import { useLoaderData } from "@remix-run/react";
import Card, { CardProps } from "~/components/card";
import Layout from "~/components/layout";

interface CardDataProps extends CardProps{
  url: string
  score: string
  by: string
}

export async function loader() {
  const response = await fetch(
    "https://hacker-news.firebaseio.com/v0/newstories.json?print=pretty"
  );

  const storyIdentifiers: any = await response.json();

  let newStories = [];

  if (storyIdentifiers) {
    for (let i = 0; i < 15; i++) {
      const storyResponse = await fetch(
        `https://hacker-news.firebaseio.com/v0/item/${storyIdentifiers[i]}.json`
      );
      const story: any = await storyResponse.json();
      newStories.push(story);
    }
  }

  return newStories;
}

export default function Index() {
  const data = useLoaderData();
  return (
    <Layout>
      {data &&
        data.map((d:CardDataProps) => {
          if (d.url) {
            return (
              <a href={d.url} target="_blank" rel="noopener noreferrer" >
                <Card
                  title={d.title}
                  point={d.score}
                  time={d.time}
                  author={d.by}
                />
              </a>
            );
          }
          <Card title={d.title} point={d.score} time={d.time} author={d.by} />;
        })}
    </Layout>
  );
}
Code Walkthrough
Let’s start from the top. We imported our reusable components and also the function called useLoaderData from remix
useLoaderData is a custom hook provided by remix to load the data into components. Remix also provides loader function which we will be called in the server before rendering the page.
Inside the loader function we fetch the data from the api , manipulate it and return the response and then we parse the response in the component and pass it on as a prop to the card component.
When you open the browser and navigate to the dev url. You should see the following
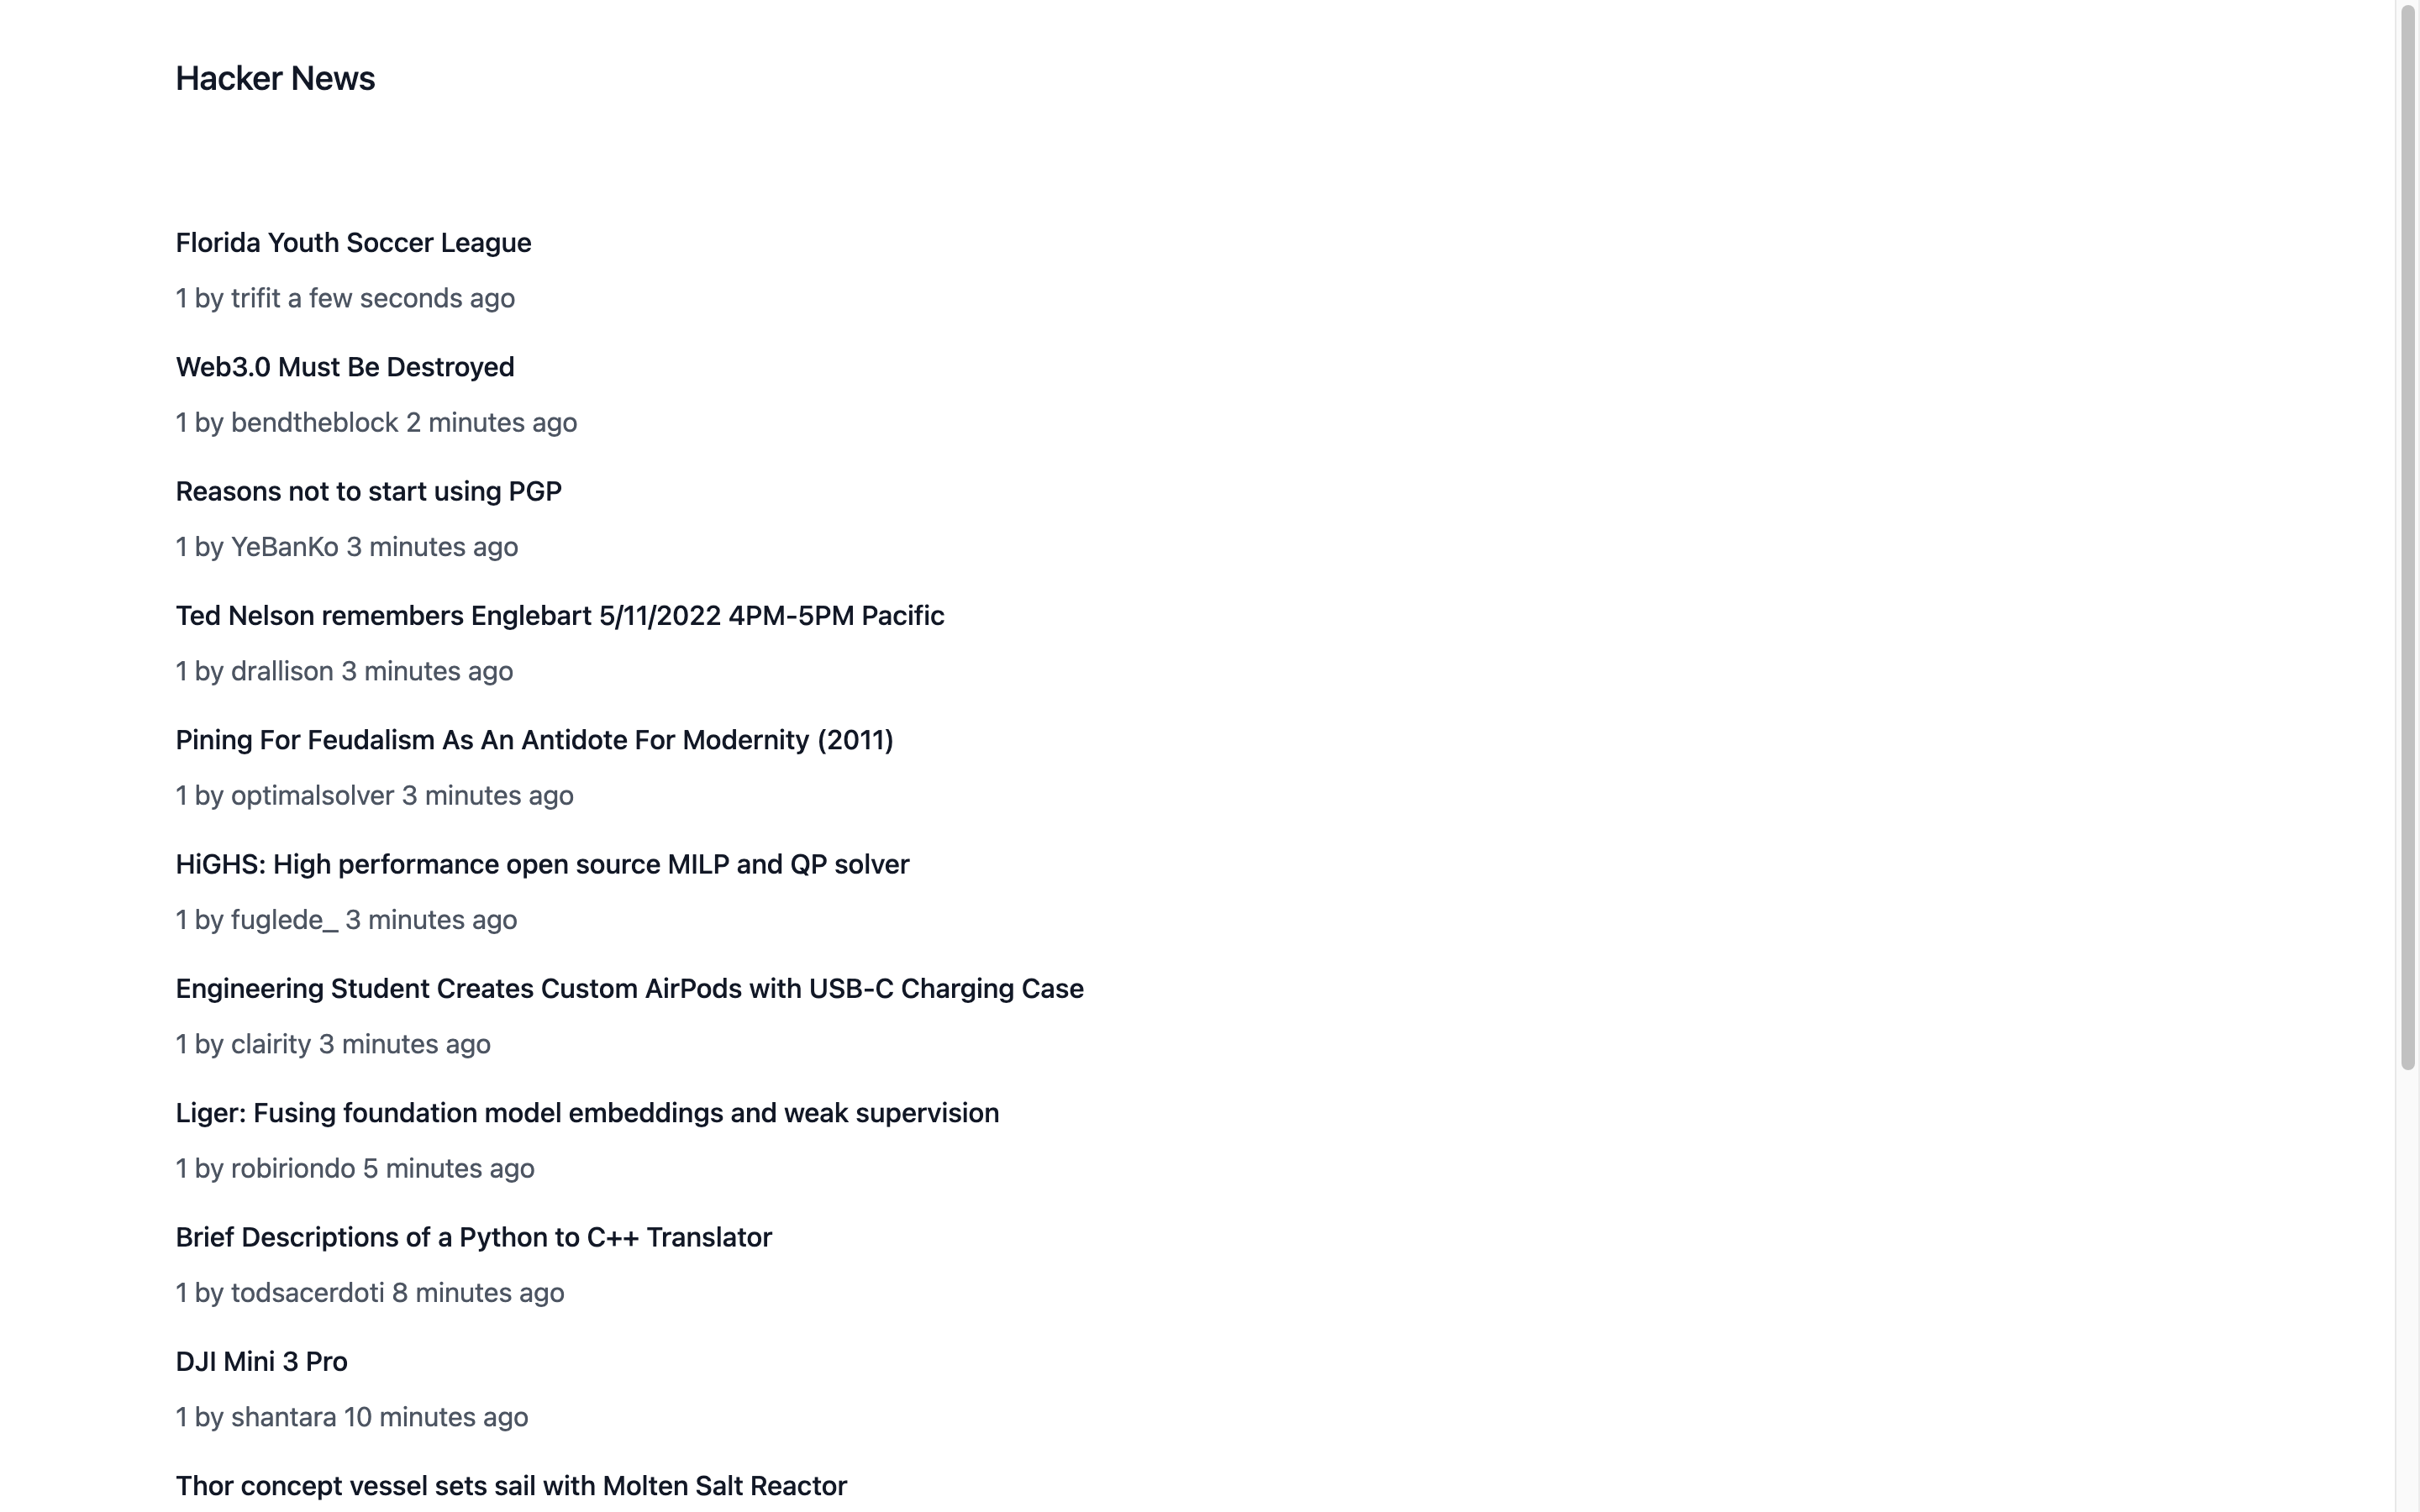
That’s it. We are done. we have now successfully created a basic Remix app with tailwind css.

Useful Resources:
Conclusion
That's pretty much it. Thank you for taking the time to read the tutorial. I hope , everyone understood how to create basic remix application.
If you found the post useful , add ❤️ to it and let me know if I have missed something or if you have any doubts in the code feel free to ask in the comments section.
Feedback on the tutorial is most welcome.
Deployed Link: https://hacker-news-clone-remix.pages.dev/
Social Links:


